The bow tie effect oval diamond buyers encounter is the single most misunderstood technical feature in fancy-shape diamond shopping — and the misunderstanding costs buyers money in two opposite directions. Some buyers reject perfectly good oval diamonds because a sales clerk warned them about any bowtie at all. Others buy a severe bowtie stone because the GIA report showed impressive grades and the static photo looked clean. Both groups pay for the same ignorance.
Every oval diamond has a bowtie effect. It is a physical optical phenomenon caused by the elongated shape's geometry — not a cutting flaw, not a quality indicator. The only question that matters is whether the bowtie in the specific stone you are evaluating is acceptable or severe. A mild-to-moderate bowtie in a well-proportioned oval at 1.35:1–1.50:1 L:W is normal, essentially invisible in most lighting, and costs nothing. A severe bowtie makes an expensive stone look dead. The two are separated by your ability to watch a 360° HD video before purchase — nothing more.
The diamond industry profits from bowtie panic. Sales clerks at physical jewelers use bowtie fear to steer buyers away from well-cut oval diamonds toward round brilliants that carry a 15–25% price premium and lower commission anxiety. Online guides tell buyers to "look for minimal bowtie" without ever defining what minimal means or how to measure it. This guide closes both gaps: here is the physics, a five-tier grading scale with specific action thresholds, the exact L:W ratios that predict bowtie severity, and a video audit protocol you can run on any Blue Nile listing in three minutes.
TL;DR
- What it is: A dark, bow-tie-shaped optical shadow across the widest section of an oval diamond, caused by elongated facets directing light away from the viewer's eye.
- Is it avoidable? No. Every oval diamond has some degree of bowtie. Claims of "bowtie-free" ovals are either misleading or describe an L:W ratio so stubby it defeats the oval's elongation advantage.
- What determines severity: Primarily the L:W ratio. Secondarily, depth percentage and table percentage. Shallow or deep ovals worsen bowtie at any given L:W.
- The Bowtie Spectrum: Five tiers from None (marketing fiction) to Severe (reject immediately). Mild and Moderate are acceptable. Strong and Severe are not.
- The 1.50 Threshold: L:W ratios below 1.50 produce mild-to-minimal bowties. Above 1.50, bowtie intensity increases measurably with each 0.05 increment. Above 1.65, most ovals show strong bowties regardless of other proportions.
- How to evaluate: 360° HD video only. GIA reports do not document bowtie severity. Static photos cannot reveal it accurately.
- Setting impact: Halos and pavé shoulders reflect additional light into the oval's center, partially masking a mild bowtie. Solitaire settings expose the bowtie most directly.
- Lab vs natural: Identical bowtie physics. Lab-grown ovals show the same spectrum of bowtie severity as natural ovals at equivalent L:W ratios.


About This Guide
I am Farzana Hasan, GIA Expert and Lead Critic at Diamond Critics. I have evaluated thousands of oval diamonds — in GIA grading labs, on Blue Nile's search tool, in private estate collections, and in the hands of buyers who came to me after discovering a problem their certificate never warned them about.
The bowtie effect is the topic I am asked about more than any other single feature in oval diamond buying. The fear around it is disproportionate to the actual risk for buyers who know what they are looking at. The ignorance around it is costly for buyers who do not.
This guide exists to make the bowtie effect legible. After reading it, you will be able to evaluate any oval diamond's bowtie from a 360° video in under three minutes, know exactly which L:W ratios to target and avoid, and understand why a mild bowtie is not the enemy — the severe one is.
For the full oval cut diamond buying guide, including pricing, lab-grown comparisons, and color/clarity rules, see the complete guide. This post goes deep on the bowtie specifically.
The Bowtie Spectrum
The diamond industry uses "bowtie" as though it describes a single, binary condition — either the stone has one or it does not. This framing is false and financially damaging. The bowtie effect exists on a continuous spectrum with five meaningful tiers, each requiring a different buying response.
Tier 0 — None (Doesn't Exist in Ovals)
No oval diamond is genuinely bowtie-free. Any stone marketed as having "no bowtie" is either being photographed in conditions that mask the shadow or has been cut to an L:W ratio below 1.25:1 — making it effectively a round with slight elongation. If you are buying an oval for elongation and finger-lengthening effect, a sub-1.25 ratio defeats the purpose entirely.
Tier 1 — Trace
The faintest suggestion of a shadow across the center, visible only under direct overhead lighting when the stone is completely stationary. Under ambient or angled lighting, the trace bowtie disappears entirely. L:W ratios of 1.25:1–1.35:1 typically produce trace bowties. This tier is the best available in practice — not "none," but functionally invisible in all normal wearing conditions.
Action: Buy confidently. The trace bowtie is the optimal outcome for oval buyers who want elongation without shadow.
Tier 2 — Mild
A visible but thin shadow across the center that appears under overhead lighting and fades significantly when the stone tilts or moves. At L:W ratios of 1.35:1–1.45:1, most well-cut ovals produce mild bowties. In a halo or pavé setting, the reflected light from surrounding stones further diminishes the mild bowtie to near-invisibility.
Action: Buy with confidence. The mild bowtie is the normal result of a properly proportioned oval. Any guide that tells you to reject a mild bowtie is costing you money.
Tier 3 — Moderate
A defined, clearly visible dark band across the center that is present under most lighting conditions but shifts and partially disappears when the stone moves. L:W ratios of 1.45:1–1.55:1 with standard proportions often produce moderate bowties. Some buyers find the moderate bowtie acceptable; others find it distracting. This is the tier that requires personal video evaluation rather than categorical rejection.
Action: Watch the video carefully. Rotate the stone through at least two full revolutions. If the bowtie shifts and shows light return during movement, the stone is alive — accept. If the bowtie stays rigid and dark regardless of angle, that is a borderline Moderate-Strong — look for another stone.
Tier 4 — Strong
A wide, dominant dark zone across the center that is visible under most lighting and partially persists even as the stone moves. Strong bowties occur at L:W ratios above 1.55:1, especially combined with excessive depth (over 65%) or shallow table (under 52%). The strong bowtie materially reduces the stone's face-up brilliance and makes the diamond look smaller than its carat weight.
Action: Reject. The strong bowtie is not a matter of personal preference — it is a functional defect that makes the stone appear less valuable than its grade and price.
Tier 5 — Severe
A permanent, rigid black shadow across the center that does not shift or break apart under any lighting angle. The stone appears as two brilliant wings separated by a dark band. Severe bowties occur in ovals with L:W ratios above 1.65:1 combined with poor depth or table proportions. These stones are occasionally sold at apparent discounts that do not reflect their real-world visual performance.
Action: Reject immediately. No price discount justifies a severe bowtie. The stone will look dead on the hand in every lighting condition.
Farzana's Expert Take: I tell every oval buyer the same thing: your enemy is not the bowtie. Your enemy is a bowtie you did not know was there before you bought. A mild bowtie in a beautiful 1.40:1 oval at G-VS2 GIA is a stone I would recommend to anyone. A severe bowtie in a D-IF stone at an apparent discount is money thrown away. The Bowtie Spectrum exists to give you the language to tell them apart — and to stop you from rejecting Tier 1 and Tier 2 stones on the advice of someone who benefits from your confusion.
The 1.50 Threshold
The most actionable piece of oval diamond bowtie data is a single number: 1.50.
The L:W ratio of 1.50:1 is the empirical inflection point at which bowtie severity shifts from routinely acceptable to requiring careful individual evaluation. Below 1.50, most ovals with standard proportions fall into the Trace or Mild tier of The Bowtie Spectrum. Above 1.50, bowtie severity increases measurably with each 0.05 increment in the ratio.
This relationship exists because the bowtie is generated by the elongated pavilion facets failing to return light to the viewer from certain angles. The longer the stone's elongation relative to its width, the larger the angular range over which the pavilion facets misdirect light — and the wider and darker the bowtie becomes.
The data by L:W tier:
| L:W Ratio | Typical Bowtie | Bowtie Spectrum Tier | Buying Action |
|---|---|---|---|
| 1.20:1–1.30:1 | Near-invisible | Trace | ✓ Buy — minimal bowtie, but limited elongation |
| 1.30:1–1.40:1 | Very faint | Trace–Mild | ✓ Ideal zone — best balance of elongation and bowtie |
| 1.40:1–1.50:1 | Visible but dynamic | Mild | ✓ Accept — normal well-cut oval |
| 1.50:1–1.60:1 | Clearly visible | Mild–Moderate | ⚠️ Evaluate video carefully |
| 1.60:1–1.70:1 | Dominant | Moderate–Strong | ⚠️ Requires video — likely reject |
| Above 1.70:1 | Severe or near-severe | Strong–Severe | ✗ Reject without video; reject with video in most cases |
The 1.50 Threshold does not mean that every oval above 1.50 is unacceptable — it means that every oval above 1.50 requires a rigorous video audit, whereas ovals below 1.50 can be evaluated primarily on certificate proportions with video as a confirmation step.
The second variable: depth percentage
Depth percentage interacts with L:W ratio to intensify or moderate the bowtie. Ideal depth for an oval is 58–62%. At depths above 65%, the pavilion facets angle more steeply, worsening the light misdirection that produces the bowtie. An oval at 1.48:1 L:W with 67% depth may show a stronger bowtie than a 1.52:1 oval with 61% depth. Both numbers must be evaluated together.
The third variable: table percentage
A small table (under 52%) reduces the area through which light enters the stone and can worsen the bowtie in the center of the stone. An overly large table (above 65%) flattens the stone optically. The sweet spot for table percentage in oval diamonds is 53–63%, which optimizes light entry and return across the pavilion.
Farzana's Expert Take: The 1.50 Threshold is the practical shortcut I use when I first review an oval's GIA certificate. If the ratio is below 1.50 and the depth is 58–63%, I have high confidence the stone will show an acceptable bowtie before I even open the video. If the ratio is above 1.50, the video becomes the decisive test. This is not a guarantee in either direction — I have seen beautiful 1.58 ovals and disappointing 1.42 ovals with unusual depth issues. But the 1.50 Threshold gives you the right starting assumption in each direction.
The Physics of the Bowtie Effect in Oval Diamonds
Understanding why the bowtie exists helps buyers stop treating it as a defect and start treating it as an optical property to manage.
An oval diamond's pavilion facets — the angled surfaces below the girdle that direct light back through the crown toward the viewer — are arranged symmetrically around the stone's center point in a round brilliant, returning light efficiently from almost every entry angle. In an oval, this symmetry is stretched along one axis. The central pavilion facets now span a longer dimension, and for light entering from angles perpendicular to the stone's long axis (roughly at the stone's widest point), those central facets redirect the light sideways — toward the viewer's peripheral vision — rather than straight back through the crown.
The result is a zone of reduced light return directly across the widest section of the stone, shaped like a bow tie because the shadow follows the same horizontal path that the stone's width traces. The shadow is dark not because the stone lacks light — it is dark because the light that enters at those angles leaves through the sides and the back of the pavilion rather than returning to the eye.
This physics is irreversible. No amount of polishing, cutting precision, or certification grade changes the fundamental geometry. A cutter can minimize the bowtie by optimizing the pavilion facet angles — good depth percentage and proper table-to-pavilion balance — but cannot eliminate it while maintaining the oval's elongated outline.
Why the Bowtie Looks Different in Photos vs In Person
Product photography systematically understates bowtie severity. Photographers typically use:
- Single overhead LED light source — a narrow, direct light from directly above the stone that illuminates the pavilion facets from the angle that minimizes shadow
- White background with reflective surface — bounces ambient light into the stone from multiple directions, filling in the bowtie shadow
- Stone positioned slightly tilted — a 5–10° tilt away from the camera axis shifts the bowtie out of direct view
The result is that product photos frequently make Moderate or even Strong bowties look like Mild or Trace. This is not deceptive in an illegal sense — it is standard product photography optimized for visual appeal — but it means that photo-based bowtie evaluation is systematically unreliable.
The 360° HD video is the only reliable evaluation method because it shows the stone rotating through all angles under consistent lighting, making the bowtie appear at its actual severity from multiple perspectives. When reviewing a video, the moment of maximum bowtie visibility — typically when the stone faces directly up under the light source — is the relevant data point. That is what you will see in certain lighting conditions on the hand.
How to Evaluate Bowtie Severity: The Three-Minute Video Audit
Every major online diamond retailer including Blue Nile provides 360° HD video for their oval inventory. This is the only evaluation tool you need. The process:
Step 1 — Open the video on the product page and let it play through one full rotation (30–45 seconds).
Watch the stone without pausing. Note the center of the stone — specifically the widest horizontal band. You are looking for a darker zone that appears and disappears as the stone rotates.
Step 2 — Pause the video at the moment of maximum shadow.
This is typically when the stone faces directly overhead. Note how wide the dark band is relative to the total face-up area of the stone:
- Thin shadow, less than 20% of stone width: Mild (Tier 2) — accept
- Visible shadow, 20–30% of stone width: Moderate (Tier 3) — watch Step 3 carefully
- Wide shadow, more than 30% of stone width: Strong–Severe (Tiers 4–5) — reject
Step 3 — Watch the shadow's behavior during rotation.
Restart the video and focus on the bowtie as the stone moves. Ask one question: does the bowtie dissolve and show brilliance when the stone tilts, or does it remain rigid and dark?
- Shadow shifts, breaks, shows light return: normal dynamic bowtie — acceptable
- Shadow remains fixed and dark throughout rotation: static severe bowtie — reject
Step 4 — Check the shoulder brilliance.
The rounded shoulder sections of the oval (the curved ends) should show active, scintillating light. If the shoulders look brilliant even while the bowtie is visible, the stone has good overall light performance. If the shoulders also look dim or flat, the stone has additional proportion issues beyond the bowtie.
What to do if there is no video: Do not purchase without video. Contact the retailer to request it. If they cannot provide one, buy from a retailer who can. Blue Nile's Ideal oval inventory includes 360° video on every listing — this is a minimum standard for oval diamond buying.
Live Price Data: Recommended Oval Diamonds on Blue Nile
These are GIA-certified oval diamonds in the Trace-to-Mild bowtie range based on their proportions. All have L:W ratios below 1.50 and depth percentages in the 58–63% range.
| Grade | Price | Link |
|---|---|---|
| G-VS2 | $2,887 | View Diamond |
| F-VS2 | $3,114 | View Diamond |
| G-VS1 | $3,272 | View Diamond |
| D-VS2 | $3,327 | View Diamond |
| D-VS1 | $3,384 | View Diamond |
| E-VS1 | $3,589 | View Diamond |
How to filter for low-bowtie ovals on Blue Nile:
- Go to Blue Nile's oval diamond search and filter for "Ideal" cut designation
- Filter L:W ratio to 1.20–1.50 (Blue Nile's search allows length/width filtering)
- Filter depth to 58–63%
- Filter table to 53–63%
- Watch the 360° video for every stone that passes the certificate filter
The certificate filter alone narrows the field from thousands of ovals to hundreds with the right proportions for low bowtie. The video audit then separates the acceptable bowties from the edge cases.
Setting Selection: How Settings Affect Bowtie Visibility
The setting style you choose materially affects how visible the bowtie appears on the hand, even with the same stone. This is an underutilized tool for buyers who fall in love with a specific oval that sits at Tier 2–3 of The Bowtie Spectrum.
Halo Settings — Best for Minimizing Bowtie Visibility
A halo of small round diamonds surrounding the oval center stone reflects additional light from multiple angles into the center stone. This lateral light injection from the halo diamonds partially fills the bowtie shadow, making it meaningfully less visible than in a solitaire.
The effect is not magical — a Severe bowtie in a halo still looks bad. But a Moderate bowtie in a halo setting with good shoulder brilliance often looks perfectly acceptable in daily wear. If your ideal oval sits at the Moderate tier of The Bowtie Spectrum and you cannot find a better proportioned stone at your budget, a halo setting is a legitimate mitigation strategy.
Halo settings on Blue Nile:
| Setting | Metal | Price | Link |
|---|---|---|---|
| Pavé Diamond Halo (JA) | 14K Yellow Gold | $1,565 | View |
| Pavé Diamond Halo (JA) | 14K White Gold | $1,565 | View |
| Pavé Diamond Halo (JA) | Platinum | $1,930 | View |
| The Ritz Oval Halo | 14K White Gold | $2,995 | View |
The oval diamond halo engagement ring guide covers every halo configuration in detail, including which halo widths and shapes create the strongest bowtie masking effect.
Solitaire Settings — Maximum Bowtie Exposure
A solitaire setting — center stone, minimal prongs, no surrounding diamonds — exposes the oval to direct viewing without any lateral light contribution from neighboring stones. The bowtie is most visible in a solitaire setting. This is not a reason to avoid solitaires — it is a reason to buy a Trace or Mild bowtie stone if you plan to set it in a solitaire.
If your stone passes the Tier 1 or Tier 2 test in video, it will look excellent in a solitaire. If it sits at Tier 3 or above, a solitaire setting will make the bowtie its most noticeable feature.
See the oval diamond solitaire engagement ring guide for the full solitaire buying framework with live prices.
Pavé Band Settings — Moderate Bowtie Mitigation
A pavé band without a full halo — just pavé diamonds extending along the shank — provides less lateral light injection than a complete halo but still improves on a plain solitaire. A good pavé band setting is a middle path for buyers who want some bowtie mitigation without the visual bulk of a full halo.
Tides Of Summer Capsule
Up To 30% Off
Shop The Sale →Vault ClearanceClear The Vault
Up To 70% Off
Shop Vault Deals →Affiliate link — no extra cost to you
Bowtie vs No Bowtie: The Buying Reality
The phrase "oval diamond bowtie vs no bowtie" reflects a misconception that no bowtie is a realistic target for oval buyers. It is not. The practical buying reality:
What you are actually choosing between:
Not "bowtie vs no bowtie" — but "acceptable bowtie vs unacceptable bowtie." The Bowtie Spectrum Tier 1 and Tier 2 stones are what "no bowtie" shoppers should be targeting. They will still have a trace-to-mild shadow under direct overhead lighting, but in ambient and angled lighting — which represents the majority of real-world wearing conditions — the bowtie is functionally invisible.
What "avoiding" the bowtie actually costs:
If a buyer genuinely wants to minimize bowtie above all other priorities, the specification is: L:W ratio 1.25:1–1.35:1, depth 59–62%, table 54–62%. This specification produces the lowest-bowtie ovals. But it also produces the least elongated ovals — stones that look like slightly stretched rounds rather than the elegant, finger-lengthening ovals that most buyers are seeking. Sacrificing the L:W ratio to eliminate the bowtie is like buying a sports car for its fuel economy. You have optimized for the wrong variable.
The sensible goal: A Tier 1 or Tier 2 bowtie in a 1.35:1–1.50:1 L:W oval with good depth and table proportions. This is achievable on Blue Nile's inventory regularly, and it delivers both meaningful elongation and an acceptable bowtie. The oval diamond engagement ring settings guide covers how to pair these stones with the right settings.
Bad Oval Diamond Bowtie: How to Identify and Reject Severe Cases
A bad oval diamond bowtie — one severe enough to materially diminish the stone's value and beauty — has specific identifiable characteristics in the video audit.
Characteristics of a severe/bad bowtie:
Shadow width exceeds 35% of the stone's face-up diameter. At this width, the dark zone becomes the dominant visual feature of the stone rather than a secondary optical artifact.
The shadow does not respond to stone movement. A dynamic bowtie shifts, breaks, and shows light return as the stone rotates. A bad bowtie sits as a rigid, static dark band regardless of viewing angle.
The shadow has sharp, hard edges. A well-cut oval produces a bowtie with soft, graduated edges that blend into the surrounding brilliance. A poorly-cut stone with a severe bowtie shows sharp, hard-edged boundaries between the dark zone and the brilliant shoulders — a sign of extreme light misdirection.
The shoulder sections appear dim. A severe bowtie is often accompanied by reduced brilliance in the shoulder facets — the rounded ends of the oval. If both the center bowtie AND the shoulders look dim, the stone has systemic light performance issues beyond what the L:W ratio alone explains.
The stone appears visually smaller than its carat weight. A severe bowtie reduces perceived size because the dark center zone is visually read as negative space. A 1.00ct oval with a severe bowtie can look smaller than a 0.90ct oval with a mild bowtie.
When to reject immediately without video:
A GIA-certified oval with any of the following combination of specs is statistically very likely to have a Strong or Severe bowtie:
- L:W ratio above 1.65:1 AND depth above 65%
- L:W ratio above 1.70:1 regardless of depth
- Table percentage below 50% combined with L:W above 1.55:1
These combinations produce the worst-performing ovals. The video audit will almost certainly confirm rejection. Filtering these out at the certificate stage saves evaluation time.
Lab-Grown Oval Diamonds and the Bowtie
Lab-grown oval diamonds follow identical bowtie physics to natural ovals. The cutting geometry that produces the bowtie is the same regardless of whether the carbon lattice was arranged underground over billions of years or in a laboratory over weeks.
This means:
- The Bowtie Spectrum applies to lab-grown ovals identically
- The 1.50 Threshold applies to lab-grown ovals identically
- The video audit is equally mandatory for lab-grown ovals
- IGI-certified lab ovals do not receive an official bowtie grade any more than GIA-certified natural ovals do
The only meaningful difference in the lab-grown context: because lab ovals sell at 50–80% below natural equivalents, the cost of rejecting a poor-bowtie stone and finding a better one is lower. A buyer who needs to evaluate three or four lab ovals before finding one with an acceptable bowtie has spent relatively little time for the price point involved.
See the lab-grown oval diamond guide for the full lab oval buying framework, including which carat weights offer the strongest value in the lab market and how IGI certification compares to GIA for oval shapes.
Bowtie Effect in Oval vs Other Shapes
The bowtie is not unique to ovals — it appears in every elongated brilliant-cut shape. Understanding how the oval's bowtie compares to the marquise and pear helps buyers calibrate their expectations when comparing shapes.
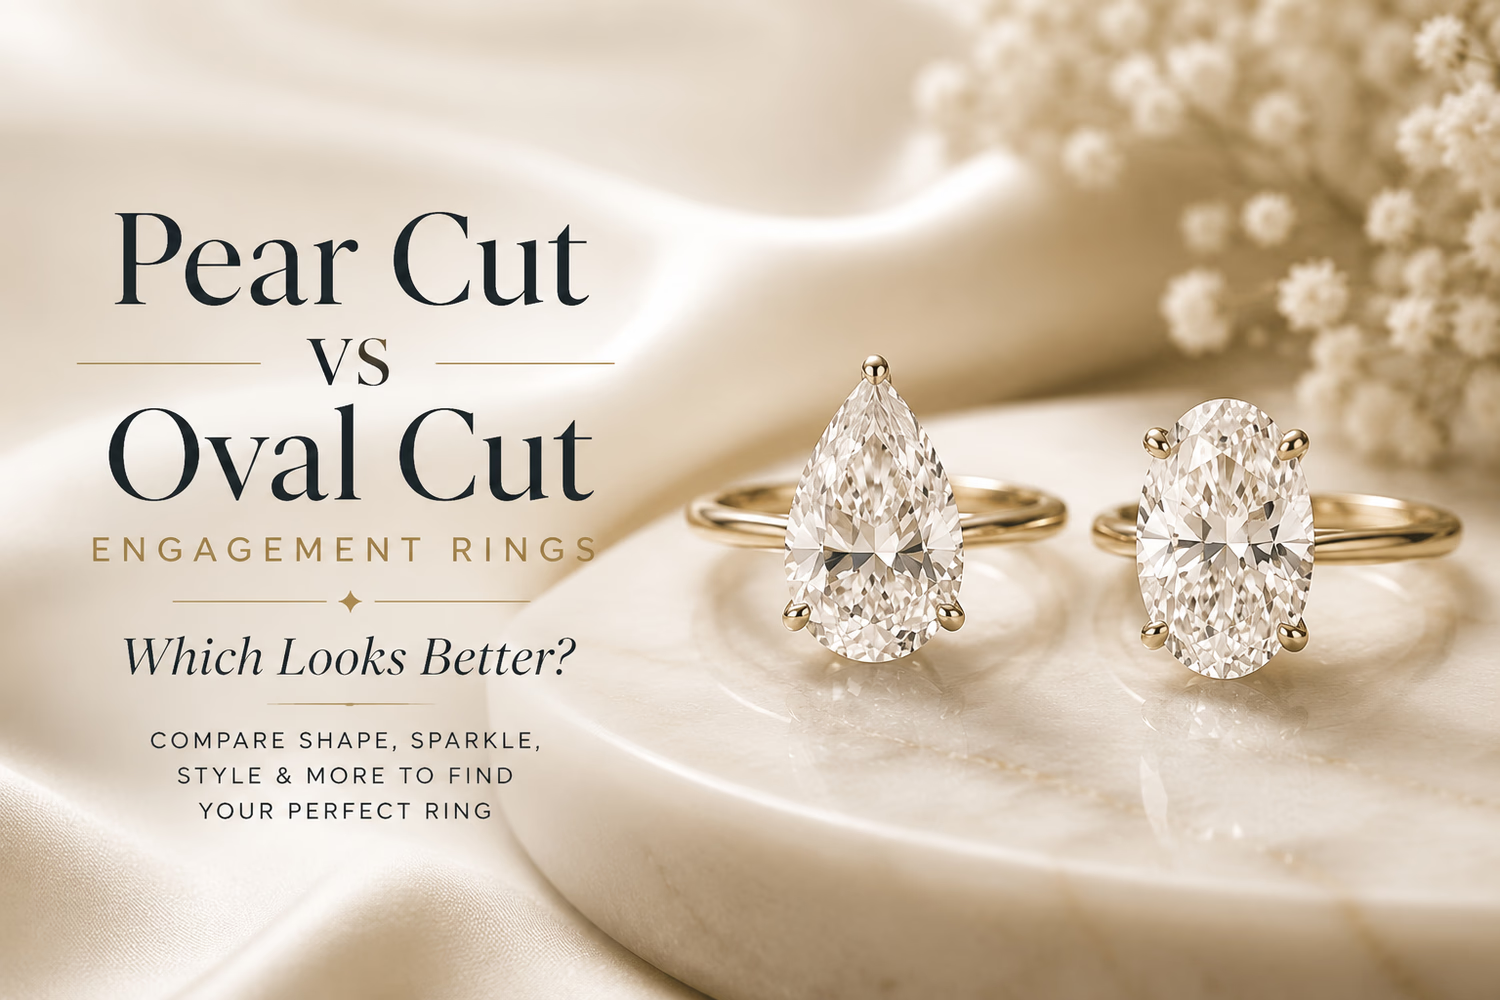
Oval bowtie: Located centrally, symmetrical, spans the widest horizontal section. Severity is primarily controlled by L:W ratio (1.35–1.50 optimal) and depth. The oval's bidirectional symmetry makes the bowtie the same from both ends, which some buyers find less distracting than the pear's asymmetrical shadow.
Marquise bowtie: Longer and more elongated than oval because the marquise's higher standard L:W ratio (1.85–2.00) creates a much longer light path. The marquise bowtie is more prominent and harder to avoid at the standard elongation ratios. Buyers who find the marquise's bowtie too prominent often migrate to oval, where the lower standard L:W ratio produces a shorter, less dominant shadow.
Pear bowtie: Concentrates in the rounded shoulder section rather than the exact center. The pear's asymmetry means the bowtie appears differently from different angles, which can make it seem more or less pronounced depending on how the stone is oriented on the hand.
The oval's bowtie is generally the most manageable of the three shapes because the 1.35:1–1.50:1 optimal range provides meaningful elongation with naturally lower bowtie severity than the marquise's 1.85:1–2.00:1 or the pear's 1.50:1–1.65:1 requirements.
Optimization Matrix: Oval Bowtie Decision Framework
| Bowtie Tier | L:W Range | What You See | In Solitaire | In Halo | Action |
|---|---|---|---|---|---|
| Trace (Tier 1) | 1.25:1–1.35:1 | Barely visible even overhead | ✓ Excellent | ✓ Invisible | ✓ Buy without hesitation |
| Mild (Tier 2) | 1.35:1–1.45:1 | Faint, dynamic shadow | ✓ Very good | ✓ Near-invisible | ✓ Buy confidently |
| Moderate (Tier 3) | 1.45:1–1.55:1 | Visible, shifts with light | ⚠️ Acceptable if dynamic | ✓ Acceptable | Watch video carefully |
| Strong (Tier 4) | 1.55:1–1.65:1 | Dominant, partially static | ✗ Reject | ⚠️ Borderline | Reject unless video impresses |
| Severe (Tier 5) | Above 1.65:1 | Rigid, dark, permanent | ✗ Reject | ✗ Reject | Reject immediately |
Proportion thresholds that worsen bowtie at any L:W:
- Depth above 65%: worsens bowtie by one tier at same L:W
- Depth below 56%: shallow stone — different light loss issue
- Table below 52%: reduces light entry into center, intensifies shadow
- Table above 65%: flattens stone, worsens overall light return
Final Verdict
The bow tie effect in oval diamonds is the most feared and most misunderstood feature in fancy-shape diamond buying. The correct mental model is not "avoid bowties" — it is "understand the spectrum and buy from the right tier."
Trace and Mild bowties (Tiers 1 and 2, L:W ratios 1.25:1–1.45:1) are the realistic target for buyers who want both elongation and clean face-up appearance. These ovals exist in volume on Blue Nile's Ideal-cut inventory and cost the same as ovals with worse bowties at identical grades. The only cost of finding them is the time spent watching videos.
Strong and Severe bowties (Tiers 4 and 5) are functional defects regardless of certificate grade. A D-IF GIA oval with a severe bowtie is worth less than a G-VS2 with a trace bowtie. The certificate does not warn you. The video will.
Farzana's Verdict: In over a decade of oval diamond evaluation, I have never seen a buyer regret a Mild bowtie once they understood what they were looking at. I have seen dozens of buyers regret a Severe bowtie they did not evaluate before purchase. The three-minute video audit is the single highest-return action available in oval diamond buying. Use it every time, without exception, before you hand over payment.
Frequently Asked Questions
What is the bow tie effect in oval diamonds? The bow tie effect is a dark, bow-tie-shaped optical shadow that appears across the widest horizontal section of an oval diamond when viewed face-up. It is caused by the elongated pavilion facets redirecting light sideways — away from the viewer's eye — rather than reflecting it back through the crown. It is a geometric optical phenomenon, not a cutting error or quality flaw.
Does every oval diamond have a bowtie? Yes. Every oval diamond has some degree of bowtie effect because the elongated shape geometry creates light misdirection across the center regardless of cutting quality. No oval diamond is genuinely bowtie-free. Stones marketed as "no bowtie" are either photographed in conditions that mask the shadow or have an L:W ratio so low (below 1.25:1) that they look like rounds.
How do I tell if an oval diamond has a bad bowtie? Watch the 360° HD video on the retailer's product page. Pause at the moment of maximum shadow and note the shadow width relative to the stone's total width. If the shadow exceeds 30–35% of face-up width, that is a Strong bowtie — consider rejecting. If the shadow stays rigid and dark even as the stone rotates and tilts, that is a Severe bowtie — reject immediately.
What L:W ratio minimizes bowtie in oval diamonds? 1.35:1 to 1.45:1 is the practical sweet spot for minimizing bowtie while maintaining meaningful elongation. Below 1.30:1, the stone looks like a round. Above 1.50:1, bowtie severity increases measurably. The 1.50 Threshold is the point at which individual video evaluation becomes critical rather than optional.
Can you see the bowtie from diamond photos? No. Product photography systematically understates bowtie severity because photographers use single overhead light sources, white reflective backgrounds, and slight stone tilts that all reduce shadow visibility. You must watch the 360° HD video. A GIA certificate cannot reveal bowtie severity either. The video is the only reliable evaluation tool.
Does the bowtie affect diamond value? Yes, indirectly. A severe bowtie makes an expensive diamond look visually inferior to a less expensive stone with a mild bowtie. Appraisers and estate buyers discount oval diamonds with visible strong or severe bowties when assessing resale value, because the stone's real-world appearance is materially compromised regardless of the certificate grades.
Does a halo setting hide the bowtie? A halo setting injects lateral light from surrounding diamonds into the center stone, partially masking Mild and Moderate bowties. A halo is not a full fix — a Severe bowtie will still appear in a halo — but it meaningfully reduces the visibility of acceptable-tier bowties. If your budget forces a compromise on bowtie severity, a halo setting provides real mitigation.
Does a bowtie get worse over time? No. The bowtie is a function of the stone's cut geometry, which does not change after purchase. It will look the same in 20 years as it does today, assuming the stone is not recut. However, prong wear or setting damage that tilts the stone in its setting can change how the bowtie appears at typical viewing angles.
Why do some oval diamonds not show the bowtie in store? Jewelry store lighting is specifically designed to minimize diamond features that buyers might find unflattering. Track lighting, LED spotlights, and overhead lighting systems used in retail environments all tend to illuminate diamonds from angles that reduce bowtie visibility. The same stone that looks clean under retail spotlights may show a much more visible bowtie outdoors or under ambient home lighting.
Is it worth paying more to avoid the bowtie in an oval diamond? Only if you are paying more for a better-proportioned stone, not for a stone simply labeled "bowtie-free." Within the same certificate grade, a stone at 1.38:1 L:W will typically have a lower bowtie tier than one at 1.58:1 — but they may sell at the same price. You are not paying more for better proportions; you are selecting better proportions from available inventory. Use the L:W filter and video audit as your selection tools, not a premium label.
Do lab-grown oval diamonds have bowties? Yes. Lab-grown ovals have identical bowtie physics to natural ovals. The carbon crystal structure is the same; the cutting geometry is the same; the light behavior is the same. The Bowtie Spectrum applies to lab-grown ovals identically, and the video audit is equally mandatory.
What is an oval diamond bowtie vs no bowtie comparison? In practice, this comparison is between Tier 1–2 (Trace/Mild) bowties and Tier 4–5 (Strong/Severe) bowties. A "no bowtie" oval for practical purposes is a Trace or Mild stone — one that shows a faint, dynamic shadow in direct overhead lighting but appears clean in all normal wearing conditions. A "bad bowtie" oval is a Severe stone with a rigid, wide, permanent shadow. The goal is to buy from the first category, not to achieve the physically impossible zero-bowtie result.
See Also
- Oval Cut Diamond: Complete Buying Guide
- Oval Diamond Engagement Ring Settings
- Oval Diamond Solitaire Engagement Ring Guide
- Oval Diamond Halo Engagement Ring Guide
- 1 Carat Oval Diamond Price Guide
- Lab-Grown Oval Diamond Guide
- Oval vs Marquise Diamond: Bowtie Comparison
- Oval vs Pear Diamond
- Elongated Oval Diamond Ring Guide
- Round Diamond vs Oval Diamond
Expert Verdict
Always audit the stone individually — no grade replaces seeing the actual diamond. The certificate tells you what to look for. Your eyes tell you whether to buy.
— Farzana Hasan, GIA Expert · DiamondCritics.com